
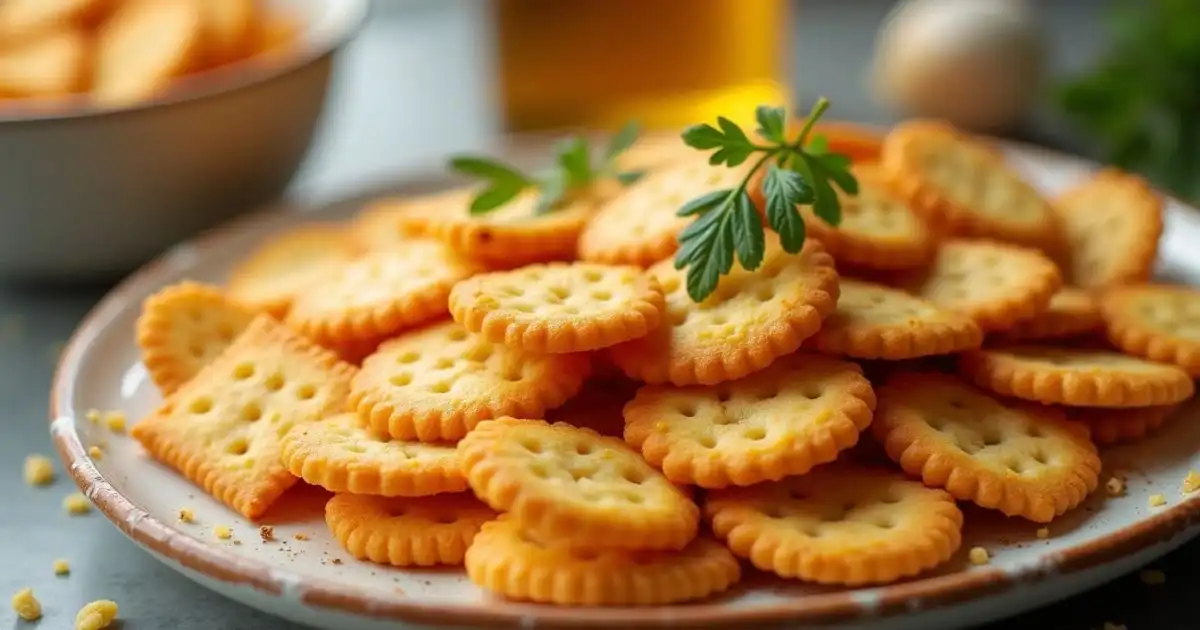
Homemade Cheez It Crackers Recipe: Crispy & Cheesy
Who doesn’t love the satisfying crunch of Cheez It crackers? These iconic snacks have graced countless lunchboxes, movie nights, and snack trays for decades. But here’s the exciting part: you don’t need to rely on store-bought options to enjoy their cheesy goodness. You can recreate these savory delights in your kitchen with a handful of simple ingredients and a little bit of effort.
In this step-by-step guide, you’ll discover how to make your own Cheez It crackers. Not only will you enjoy a fresher, more flavorful version, but you’ll also have the freedom to tweak the recipe to suit your preferences. Whether you want to cut out additives or experiment with new flavors, this guide has you covered.
Table of Contents
Why Make Your Own Cheez It Crackers ?
You might be wondering, “Why go through the trouble of making something I can easily buy?” The advantages can be summed up in three key benefits: health, customization, and the pleasure of cooking..
Healthier Snack Options
Store-bought snacks often come with preservatives, artificial flavors, and other ingredients you might not want in your diet. When you make Cheez It crackers at home, you have complete control over what goes into them. It’s a cleaner, healthier choice that doesn’t compromise on taste.
Customize to Your Heart’s Content
One of the best parts of making your own crackers is the ability to tailor them to your liking. Love spice? Add a pinch of cayenne , Prefer a milder flavor? Go easy on the seasonings. The possibilities are endless, making this recipe a versatile addition to your snack repertoire.
Fun and Rewarding
Baking Cheez It crackers is more than just a cooking project—it’s an experience. Whether you’re bonding with family, indulging in a solo culinary adventure, or introducing kids to the joy of baking, this activity is as fun as it is delicious.
Ingredients for Homemade Cheez It Crackers
Before starting the process, collect these essential ingredients.
Ingredient List
| Ingredient | Quantity | Notes |
|---|---|---|
| Sharp Cheddar Cheese | 8 oz (225g) grated | Provides that signature cheesy flavor. |
| Unsalted Butter | 4 tbsp (57g) | Cold and cubed for a flaky texture. |
| All-Purpose Flour | 1 cup (120g) | Forms the base of your dough. |
| Salt | 1/2 teaspoon | Adjust based on taste preference. |
| Paprika (optional) | 1/4 teaspoon | Adds color and a subtle kick. |
| Water | 2–3 tablespoons | Helps bind the dough. |
Tools You’ll Need
You don’t need fancy equipment to nail this recipe. These common kitchen tools will get the job done:
- Food processor: Essential for blending ingredients into a smooth dough.
- Rolling pin: Helps you achieve the ideal cracker thickness.
- Parchment paper: Keeps the dough from sticking and makes cleanup a breeze.
- Baking sheet: For crisp, evenly baked crackers.
- Pastry cutter or sharp knife: Ensures uniform cracker shapes.
Step-by-Step Instructions
Ready to dive in? Follow these straightforward steps to create homemade Cheez its crackers that rival the originals.
Step 1: Prepare the Dough
- Combine Ingredients: Begin by adding the grated cheese, butter, flour, salt, and paprika to your food processor. Pulse until the mixture resembles coarse crumbs.
- Add Water Gradually: Slowly incorporate water, one tablespoon at a time, while pulsing the processor. The dough should come together without becoming sticky.
- Chill the Dough: Tightly wrap the dough in plastic wrap and refrigerate for at least 30 minutes. Chilling makes it easier to roll out later.
Step 2: Roll Out and Cut
- Preheat the Oven: Set your oven to 175°C.
- Roll the Dough: Place the chilled dough between two sheets of parchment paper and roll it out to a thickness of about 1/8 inch.
- Cut into Squares: Use a pastry cutter or a sharp knife to slice the dough into small, 1-inch squares. For an authentic Cheez-It appearance, strive for neat and uniform shapes.
Step 3: Bake to Perfection
- Arrange on Baking Sheet: Place the squares on a parchment-lined baking sheet, leaving a bit of space between each piece.
- Poke Holes: Use a toothpick or skewer to poke a hole in the center of each square—this not only looks authentic but also prevents puffing during baking.
- Bake: Bake for 12–15 minutes, or until the crackers are golden brown and crispy.
- Cool Completely: Let the crackers cool on a wire rack before storing them.
Pro Tips and Variations
Pro Tips for Perfect Crackers:
- Use cold butter: Cold butter creates tiny steam pockets as it melts, giving the crackers a flaky, crisp texture.
- Grate cheese yourself: Pre-shredded cheese has anti-caking agents that prevent it from melting smoothly. Freshly grated cheese gives the best flavor and texture.
- Don’t overwork the dough: Over-mixing develops gluten, which makes crackers tough instead of crunchy. Handle just enough to bring it together.
- Roll dough evenly: Consistent 1/8-inch thickness ensures crackers bake evenly — too thick stays soft, too thin burns quickly.
- Bake until golden brown: Color = crunch. The darker the edges (without burning), the crispier the crackers will be.
Variations to Try:
- Cheese Variety:
- Sharp Cheddar: The classic choice for that rich, tangy flavor.
- Parmesan: Swap cheddar for parmesan for a more savory, nutty taste.
- Pepper Jack: Spice things up with pepper jack for a zesty kick.
- Gouda: Use gouda for a smooth, creamy flavor with a slightly smoky undertone.
- Flavor Add-ins:
- Garlic Powder: A popular addition for a savory punch.
- Onion Powder: Perfect for adding a mild, sweet onion flavor.
- Cayenne Pepper: For those who like a spicy kick, sprinkle in a pinch of cayenne pepper.
- Dried Herbs: Basil, thyme, or rosemary can elevate your crackers to a more gourmet level.
- Lemon Zest: For a fresh, citrusy twist, add a touch of lemon zest to the dough.
- Gluten-Free Option:
- For a gluten-free version, replace the all-purpose flour with a gluten-free 1:1 baking flour. This will slightly change the texture, but the flavor will still be just as delicious. Add xanthan gum if needed to help with structure.
- Vegan Version:
- Dairy-Free Cheese: Substitute the sharp cheddar with a dairy-free cheese of your choice.
- Vegan Butter: Swap out the unsalted butter for a plant-based alternative to make this recipe completely vegan-friendly.
- Flaxseed for Binding: If you prefer a vegan egg alternative, try using ground flaxseed mixed with water as a binding agent.
- Herb-Infused Crust:
- For a more fragrant, savory crust, add finely chopped fresh herbs like rosemary, thyme, or sage into the dough for extra flavor and a rustic touch.
- Sweet Version:
- For a fun twist, you can make a sweet version of these crackers by adding a little sugar and cinnamon to the dough. These would be great paired with a cup of tea or as a snack for the kids!
With these variations and tips, you can easily customize your homemade Cheez It crackers to suit your tastes or dietary needs. Get creative and make them your own!
Serving Suggestions
Homemade Cheez It crackers are not only delicious on their own, but they can also be paired with a variety of other snacks and dishes to elevate your snacking experience. Here are some tasty ideas to serve your freshly baked crackers:
- With Dips:
- Cheese Dip: Pair your crackers with a warm, creamy cheese dip for a classic cheesy combo. A blend of sharp cheddar and cream cheese works wonderfully!
- Guacamole: The creamy texture of guacamole contrasts beautifully with the crunchiness of the crackers, creating a fresh, flavorful snack.
- Salsa: A zesty tomato salsa or a tangy mango salsa provides a nice contrast to the cheesy richness of the crackers.
- Spinach Artichoke Dip: A rich, savory dip like spinach artichoke is a crowd-pleaser and complements the crispiness of the crackers.
- As a Side:
- Soup: Serve your crackers as a crunchy accompaniment to soups like tomato bisque, creamy potato leek, or a hearty vegetable soup. The crackers add an extra layer of texture and flavor.
- Salads: Crumble the crackers over a fresh salad for added crunch. A Caesar or spinach salad is an ideal pairing for a cheesy crunch.
- Charcuterie Board:
- Homemade Cheez It crackers make an excellent addition to a charcuterie board. Pair them with a selection of cheeses, cured meats, fresh fruit, olives, and nuts for a balanced and visually appealing spread.
- Consider offering a variety of dips, like honey mustard or a tangy pesto, for even more pairing options.
- On Their Own:
- Sometimes, the simplest option is the best! Enjoy your homemade Cheez It crackers as a standalone snack, perfect for munching on during a movie, at a party, or while relaxing at home.
- In Lunchboxes:
- Pack them in your kids’ lunchboxes for a tasty, homemade snack that’s far healthier than store-bought alternatives. You can even add a side of hummus or ranch for dipping to make it more fun.
- With Drinks:
- Wine Pairing: A light, crisp white wine like Sauvignon Blanc or Chardonnay pairs well with the sharp, cheesy flavors of the crackers.
- Beer Pairing: An IPA or pale ale complements the rich, savory notes of the crackers, creating a delightful contrast.
- Sparkling Water or Lemonade: If you prefer a non-alcoholic option, a sparkling beverage with a squeeze of lemon is refreshing and pairs beautifully with the crackers.
- As a Party Snack:
- Serve your crackers at your next gathering or get-together. They’re perfect for passing around at parties and make a great finger food that everyone will love. You can even spice them up by adding a drizzle of hot sauce or a sprinkle of parmesan before serving!
These serving suggestions make your homemade Cheez It crackers versatile enough for any occasion, whether you’re hosting a dinner party, enjoying a casual snack, or packing a lunch.
Homemade Cheez It Crackers Recipe: Crispy & Cheesy
Ingredients
- 8 oz sharp cheddar cheese Grated, provides that signature cheesy flavor
- 4 tbsp unsalted butter Cold and cubed for flaky texture
- 1 cup all-purpose flour Forms the base of the dough
- 1/2 teaspoon salt Adjust to taste
- 1/4 teaspoon paprika Optional, adds color and subtle kick
- 2–3 tbsp water Add gradually to bind dough
Instructions
- Step 1: Prepare the DoughAdd cheese, butter, flour, salt, and paprika to a food processor. Pulse until coarse crumbs form. Add water gradually until dough comes together. Wrap in plastic and chill for 30 minutes.
- Step 2: Roll Out and CutPreheat oven to 175°C (350°F). Roll dough between parchment sheets to 1/8 inch thickness. Cut into 1-inch squares. Poke a hole in the center of each with a toothpick.
- Step 3: Bake to PerfectionArrange squares on parchment-lined baking sheet. Bake 12–15 minutes until golden and crisp. Cool completely on a wire rack before storing.
Notes
- Cheese: For best results, use a block of extra-sharp cheddar and grate it yourself. Do not use pre-shredded cheese.
- Crispiness: The key to crispy crackers is rolling the dough to a uniform 1/8-inch thickness.
- Baking: Watch the crackers closely in the final minutes. The deeper the golden-brown color on the edges, the crispier they will be.
Troubleshooting Common Problems (FAQ)
Why is my dough too crumbly and not coming together?
It needs more liquid. Add 1 teaspoon of ice water at a time, mixing gently until the dough holds when squeezed. Don’t over-mix.
Why did my crackers turn out soft instead of crispy?
They were likely rolled too thick or under-baked. Roll dough to 1/8-inch thickness and bake until the edges are deep golden brown.
How do I make these without a food processor?
Use a pastry blender or two knives to cut cold butter into the flour-cheese mixture until it looks like coarse crumbs. Stir in ice water until dough forms.
Conclusion
Creating homemade Cheez It crackers is a fun and rewarding way to enjoy a healthier, tastier version of a beloved snack. By following this step-by-step guide, you’ll master the art of making crispy, cheesy crackers that are sure to impress your family and friends.
So, what are you waiting for? Gather your ingredients, roll up your sleeves, and get ready to bake your way to snack perfection. And don’t forget to share your creations—you might just inspire others to ditch the store-bought snacks for good!
Ready to try this recipe? Bookmark this page, share it with a friend, and start baking today!
Have you given our recipe a try ?
There are no reviews yet. Be the first one to write one.
Last Updated on September 24, 2025 by Janelle

- Cream Cheese Corn Dip: Easy Recipe Ready in 20 Minutes - January 24, 2026
- Perfect Cheesecake Cookies (Soft, Tangy & Rolled in Graham Crust) - December 27, 2025
- The Ultimate Turkey Cheese Sandwich: Hot Melt and Cold Deli Recipes - December 13, 2025